How to "Fix" Microsoft Outlook 2007
Outlook 2007 Setup Guide
This guide focuses on making Outlook 2007 more usable. If you are using Outlook 2007, even on Windows 2000, you're in the right place! If you are using a newer version of Outlook, see our guide for newer versions of Outlook. If you are using an older version of Outlook, see our guide for older versions of Outlook. If you are not using Outlook, then what are you doing here? Check out our MailNews guide instead.
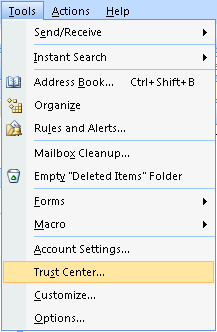
- Go to Tools → Trust Center
- Go to the Email Security Tab and check "Read all standard mail in plain text" and "Read all digitally signed mail in plain text". Click OK.
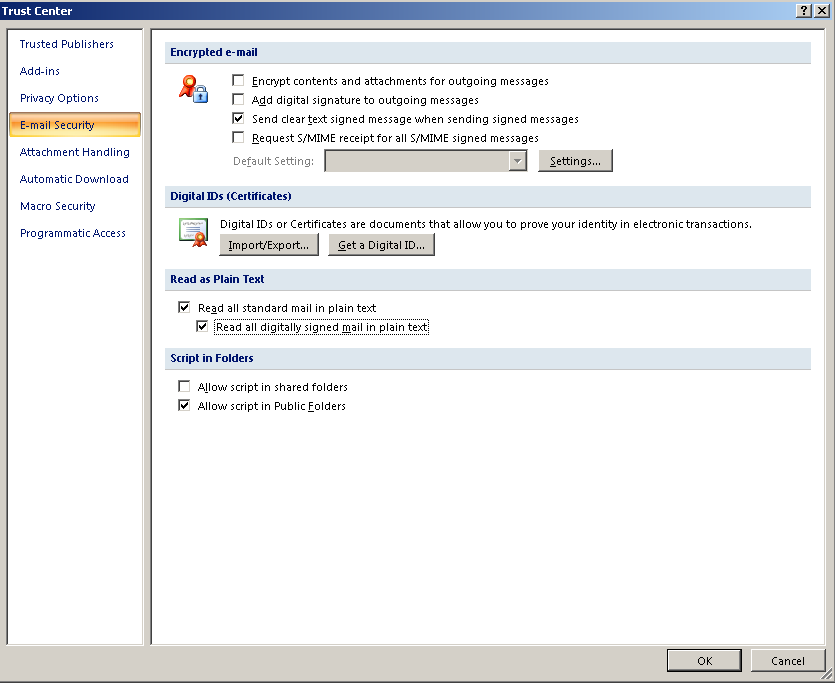
- Now, go to the Add-ins tab.
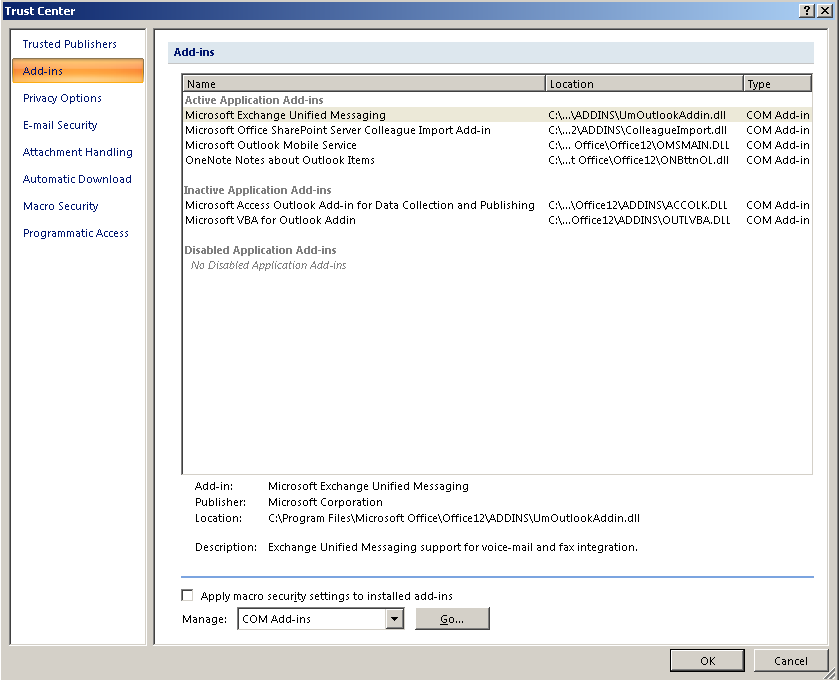
Click Go at the bottom. Uncheck all the checkboxes. Then click OK and OK.
Now, reopen the Trust Center and go back to Add-ins. Click Go and then check the checkbox for Microsoft VBA for Outlook Addin. (You must uncheck this along with all the others and then recheck it to enable it; even though it will be checked by default, it is not enabled unless you uncheck it and then recheck it). Your window should now look like this: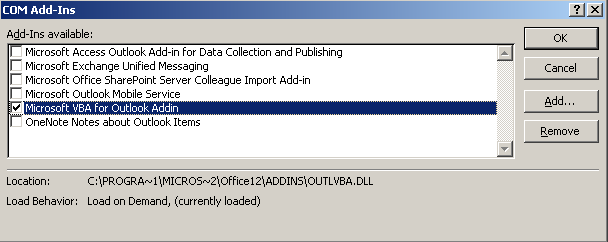
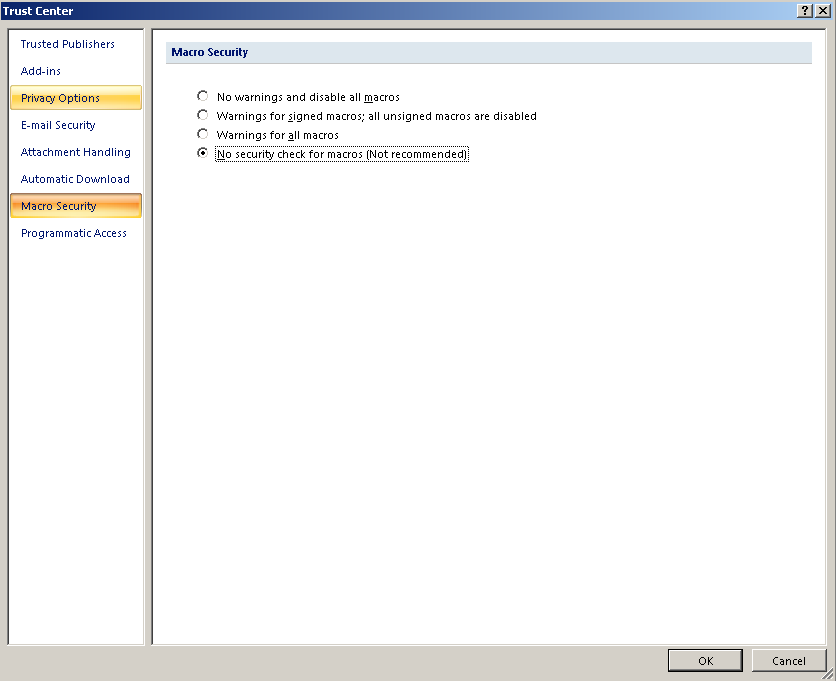
- Now, go to the Macro Security tab. Select No security check for macros (Not recommended).
- Go to Tools → Options

- Click Email Options. Then, under On Replies and Forwards, for both dropdowns, select Prefix each line of the original message. Click OK. If you get a warning, just click OK.
If you'd prefer it this way, you can also check the box right at the top for "Close original message on reply or forward".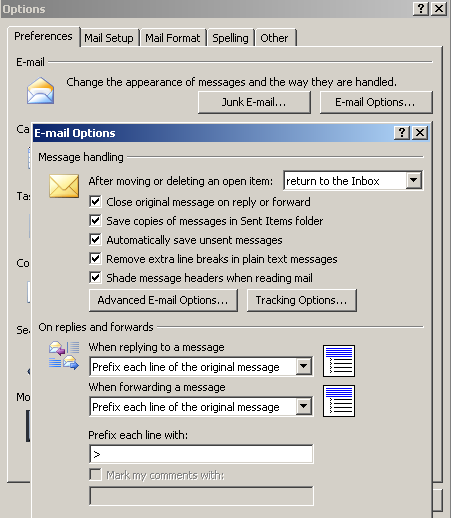
- Go to the Mail Format tab and change Message Format compose format from HTML to Plain Text. Click Apply.
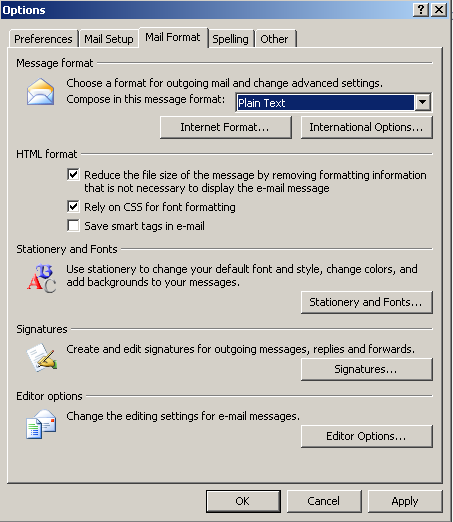
- Click the Stationery and Fonts button. Under "Composing and reading plain text messages", click Font. Change the font to Calibri and the size to 11. Click OK and then OK.
Note that this changes the look closer to that in Outlook 2010. Consolas is the default font in Outlook 2007. Note that Consolas is monospaced whereas Calibri is not. If you read or send a lot of formatted mail that relies on monospaced fonts to "look right", then you should probably keep this at the defaults. Overall, it just looks a bit cleaner and more modern if you change it to Calibri, but this is entirely subjective and optional.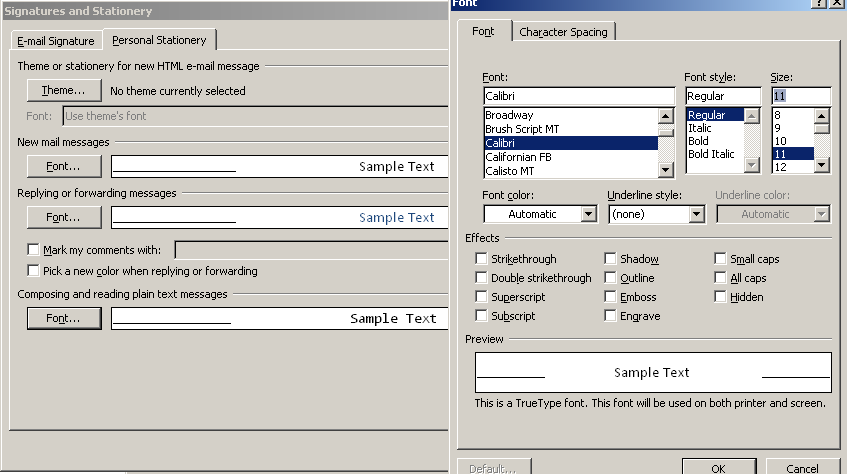
- Now, go to the Other tab. Click Advanced Options.
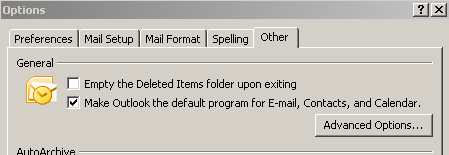
- Uncheck "Show prompts to enable Instant Search". This is the last checkbox under General settings.
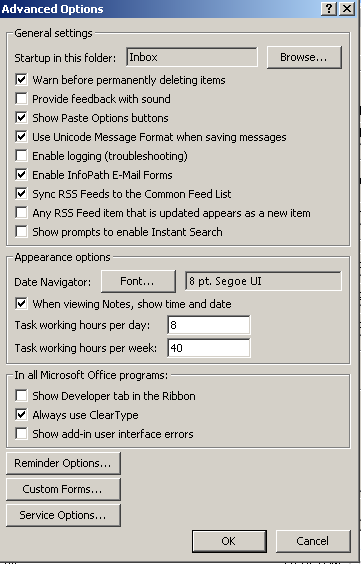
- Also in Advanced Options, click the Browse button at the top to change the default startup folder. Change this to the Inbox of your primary email account.
- In Outlook 2007, you can universally disable the Reading Pane without using a startup switch as with Outlook 2003. To do this, close Outlook and then copy and paste the following into Notepad:
Windows Registry Editor Version 5.00

[HKEY_CURRENT_USER\Software\Policies\Microsoft\office\12.0\outlook\options]
"disablereadingpane"=dword:00000001
Now, save as disable-reading-pane-2007.reg and then run the registry script. When you open up Outlook again, the reading pane will be gone from all folders!
The same script works for Outlook 2010 and 2013, by the way. Just change 12.0 to 14.0 and 15.0, respectively. - Now, go to Tools → Customize. This is how you tweak the toolbar. As you've probably noticed, Office 2007 is half-ribbon and half not. Even parts of Outlook are split between the older interface and the new ribbon interface.
By default, there's no Mark Read/Unread button(s) on the toolbar. You can easily add them by going to Edit and scrolling all the way down to them. Simply (one at a time) click and drag each to the desired position on the toolbar.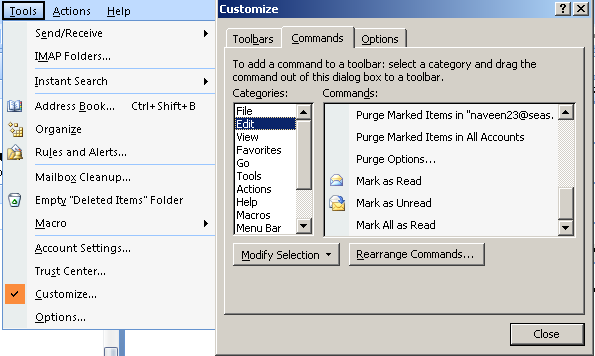
When you're done, your toolbar may look something like this. We've boxed the added buttons on the toolbar. One of them always marks as read (left) and one always marks as unread (right).
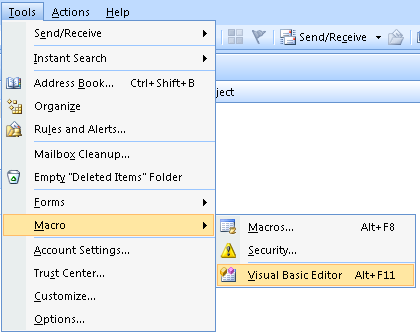
- Now, go to Tools → Macro → Visual Basic Editor.
- Expand the tree on the left and then double click on ThisOutlookSession to open the editor window.
- Copy and paste the following code into the editor window:
'************************************************************************************************** 'Description: ' ' VBA Script that expands all IMAP accounts by placing focus on each accounts Inbox folder '************************************************************************************************** Private Sub Application_Startup() ExpandAllIMAPAccounts End Sub Private Sub ExpandAllIMAPAccounts() On Error GoTo On_Error Dim session As Outlook.NameSpace Dim report As String Dim accounts As Outlook.accounts Dim account As Outlook.account Set session = Application.session Set accounts = session.accounts For Each account In accounts If account.AccountType = Outlook.OlAccountType.olImap Then FocusThisAccountInbox (account.DisplayName & "\Inbox") End If Next Exiting: Exit Sub On_Error: MsgBox "error=" & Err.Number & " " & Err.Description Resume Exiting End Sub Private Function FocusThisAccountInbox(ByVal FolderPath As String) On Error GoTo On_Error Dim oFolder As Outlook.Folder Dim FoldersArray As Variant Dim SubFolders As Outlook.Folders 'Convert folderpath to array FoldersArray = Split(FolderPath, "\") 'index 0 = account name Set oFolder = Application.session.Folders.Item(FoldersArray(0)) Set SubFolders = oFolder.Folders 'index 1 = Inbox folder Set oFolder = SubFolders.Item(FoldersArray(1)) Set Application.ActiveExplorer.CurrentFolder = oFolder DoEvents Exit Function Exiting: Exit Function On_Error: MsgBox "error=" & Err.Number & " " & Err.Description Resume Exiting End Function - Press CTRL+S to save and then exit the editor window that popped up and then exit the Visual Basic Editor. Close Outlook and restart. Now, all your IMAP accounts should be expanded on startup so your unread counts for each mailbox, rather than only the mailbox to which Outlook opens, will be updated with the correct values. If you don't do these four steps, all your other mailboxes will appear is all messages have been read until you manually expand them or click on of their folders.
Those are the basic setup steps. We've purposely largely avoided touching on views, here. Conversation View in Outlook 2007, as in Outlook 2003, is broken; full support for conversations doesn't appear until Outlook 2010 (if you're using XP or newer, you should use Outlook 2010, but if you have Windows 2000, that's not really an option, as the kernel updates only allow you to upgrade from Office 2003 to Office 2007, not all the way to 2010). You should know that conversations in Outlook 2007 are about as primitive as they are in Outlook 2003. Outlook 2007 doesn't support conversations, so it can crudely group together all items in a single folder with a similar subject, and that's about it. Still, it may help to enable this, which you can do by going to View → Arrange By → Conversation.
Here are the basic steps to setting a uniform, detailed view for all your folders:
- Navigate to an inbox or custom mail folder.
- Go to View → Arrange By and make sure that "Show in Groups" is unchecked.
- Go to View → Current View, and ensure IMAP Messages is selected.
- Right-click on a column header and go to Customize Current View. Click Fields. Near the bottom, you'll see "To" and "Sent". Click Add to add these to the right hand side.
- Drag To up so that it is between Subject and Received.
- Drag Sent up so that it is between Received and Size.
- Resize the columns appropriately so that Received and Sent are about the same width and To is roughly the same size as From. Any excess room should be occupied by Subject, not the new columns.
- Go to View → Current View → Define Views, and click IMAP Messages. At the bottom, click Apply View.
- This should apply the view to all of your mail folders, but if it does not, go to each account and apply this view to its Inbox. If it still does not, you may need to run outlook.exe /cleanviews to discard all custom views and then refollow the above procedure.
You could also create a custom view and perform the same steps, but it's easier to modify the default IMAP view, because then you don't need to change the view of every single mail folder. Modifying the default template and then re-applying the view will update all your folders automatically, since the default view for all mail folders is already the one you modified.
The really good news is that Outlook 2007 doesn't seem to "break" Conversation View in newer Outlooks like Outlook 2003 does. In Outlook 2003, replying to a message would spawn what newer Outlooks treated as an entirely separate conversation. In Outlook 2007, it appears to work the same way, but replies in Outlook 2007 actually show up as part of the same conversation in newer versions of Outlook. Of course, we did limited testing with this, so take this with a grain of salt, but conversation support is improved in Outlook 2007, although not yet complete as it is in Outlook 2010. It's not great, but at least it doesn't break anything like Outlook 2003 does.
In fact, you can entirely disable Conversation View in Outlook 2007 (which we admit, looks much nicer than the ugly Conversation grouping prior to Outlook 2010), and conversations still won't be broken in newer versions of Outlook! This means you can use Conversation View in Outlook 2010+, and if you reply to an email in Outlook 2007 with Conversation View disabled, you won't break the conversation properties. Good to know! So feel free to disable conversation grouping entirely.
You are also forewarned that, like Outlook 2003, Outlook isn't intelligent enough to know, based on your current folder, what email address to send from if you compose a new email. Be sure your default email is set appropriately and be in the habit of always checking your From address for every new email (N/A if you only have one account).
Okay, enough bad news, what's the good news?
Outlook 2007 finally lets you set the Sent Items folder for each account. You don't need to worry about messages accidentally getting saved locally on your computer and not syncing with the server.
Outlook will conveniently remind you the first time you send an email from a particular account if you have not designated a folder to save sent items to. Be sure to specify the Sent folder on the server when this dialog appears.
Also, Outlook 2007 has vastly superior support for calendaring compared with Outlook 2003, in two major ways:
- Internet Calendars. You can import ICS calendars from the Internet and they will be continually updated. Not as seamless as an Exchange calendar, since it's one way to Outlook (to edit events, you'll need to use a version of Outlook that supports Exchange on the OS on which it is installed, which might mean 2010 on Windows 7 or newer or possible (ugh!) Office 2013 or newer). But, if you just need to see your calendar and can make occasional edits to it on a different PC, the good news is you can seamlessly view all your calendars in Outlook 2007 (even on Windows 2000). To add an Internet calendar, go to Tools → Accounts and go to the Internet Calendars tab to add a new Internet calendar.
- Overlays Outlook 2007 supports overlays! This means if you have multiple calendars, your life just got a lot, lot easier. You can keep all your calendars separate and simply lay them all on top of each other. Since your calendars are color coded, you can easily visually distinguish which events are on which calendars.
Hint: It's not intuitive how you change calendar colors, as there's no menu option anywhere to do so. Colors don't "stick" to calendars; they're applied in the order the calendars are checked. For instance, in our testing, the first additional calendar checked is green and the second is red. The default calendar is blue. If you want a particular calendar to be green, check the box for that one first under "Other Calendars" and then the one you want red second, etc. If the colors are wrong, uncheck all the calendars and start over.
The bad news is the "Next 7 Days View" didn't appear until Outlook 2010, so the best you can do is change the view to "Week" and then select "Show full week" to see all 7 days of the week.
Of course, you won't be able to view Internet calendars, or any calendar besides your default, local, personal calendar, in the Calendar pane on the Mail tab, but this applies to all versions of Outlook, past and present.